10.16.2011
Cemetery Columns Part V
After the black-wash painting was complete, some lighter grey and white were added. Some cracks were also carved into the foam and some moss hot-glued on. Then the whole column got a coat of polycrylic to seal and waterproof. Finally, the skeleton sconces from earlier were painted gold, then dusted with black and mounted using drywall screws. All done with the columns, on to the gates!
9.28.2011
Cemetery Columns Part IV
Painting and more painting. First coat is some exterior kilz primer. Second coat is another primer tinted grey. After the primer, the whole thing gets a watered down latex/acrylic mix of dark grey. Before the paint is dry, a wet rag is used to remove the paint from the high spots but leave it in place in the cracks and crevices. To give the illusion of more depth, a highlight is added by removing more paint from the top 'lip' of each 'stone' and exposing the grey paint underneath.
9.11.2011
Cemetery Columns Part III
Some extra joint compound and some sanding done the other day to add some more definition. These are now ready to prime for painting. I've attached some pics too of some 'skeleton sconces' which will be placed on the front of the columns.
9.05.2011
Cemetery Columns Part II
Started the Cemetery columns this past weekend. The stone pattern was made by skim coating the column with joint compound and running my finger through it while wet to make the 'mortar joints'. Next up is priming and then painting!
8.31.2011
New Project - Cemetery Columns
Working on a new project this Labor Day to build out some Cemetery Columns. I've seen many of these built but none quite having the 'gothic tomb' type of look I'm going after.
Here's the plan -- build a frame using 2x2 stock sheathed in 1/2" OSB. Next, add some trim detail to top and bottom, with the top detail and cap using extruded foam board to save on weight. To make the stonework I plan on covering the OSB with spackle/joint compound and then 'carve' out the mortar joints to get depth. Then I'll seal and paint the whole thing to weather proof it and get the right aged look.
Still deciding what to put between the columns, but I'm leaning towards a gate constructed out of PVC similar in style to the existing fence.
8.30.2011
8.26.2011
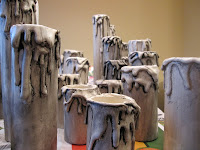
PVC Candles Phase II
I really liked how the PVC candles I made two years ago turned out. So I'm making more this year. These will be 'antiqued' with some black paint and placed outside in the graveyard. Making these is super easy, PVC + Hot Glue + Cardboard + LED Tea Light.
Giant Spider Project
New for this year is a giant spider. When complete it will measure ~6-7 feet and will be hoisted up to a web that is somewhere around 14 feet. It will be one of those fat and nasty brown furry spiders that freak everyone out.
8.24.2011
Website tweaking
Been messing around with the format of the website, you know, installing new cobwebs and stuff.
8.23.2011
Subscribe to:
Posts (Atom)


